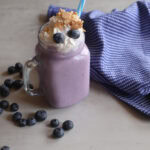


I was given this delicious Ghosts in the Graveyard recipe by my best friend from high school at my bridal shower. She knew I'd want to make these with my kids one day. This version is made with pumpkin spice pudding, classic cool whip and crushed cookie combo. It's a fun and Halloween no-bake treat that’s as delicious as it is cute and a little creepy.

💕Why I Love This Recipe (and You Will Too!)
👻 It’s Halloween Fun in a Pan
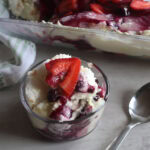
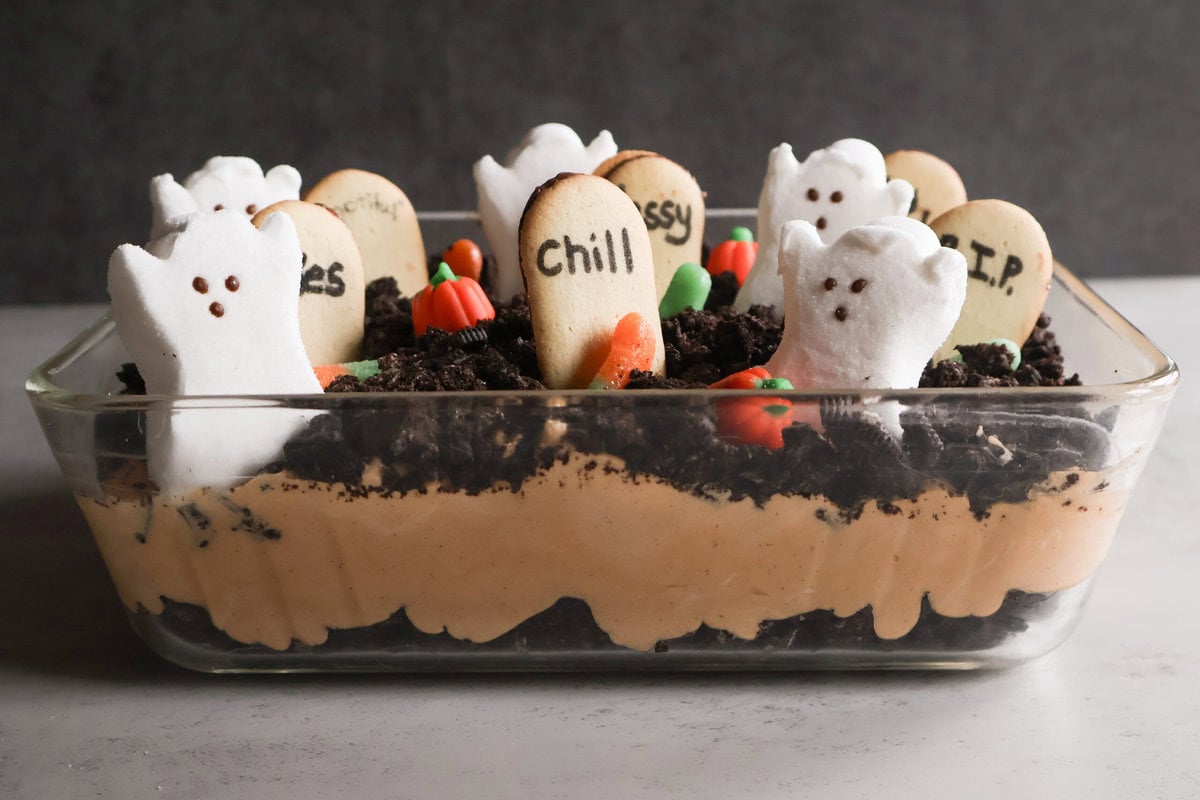
This dessert looks straight out of my best childhood memories. It's complete with edible tombstones, candy pumpkins, and little marshmallow ghosts popping out of “dirt.”
👻 Pumpkin Spice + Chocolate = Fall Flavor Heaven
The combo of pumpkin spice pudding and chocolate cookie “dirt” is a match made in Halloween heaven. You get warm, cozy fall taste with that deep chocolate crunch.
👻 No Bake = No Stress
No oven, no timers, no chaos. Just mix, layer, and chill. We love the kind of recipes that looks like you worked hard, but they secretly took 15 minutes and zero effort. It's a win-win!
Jump to:

🧡 Key Ingredients to Spotlight
Pumpkin Spice Pudding Mix: This is my unique twist on this recipe that makes it more festive and fall-like.
Crushed Chocolate Sandwich Cookies (aka Oreos): These are your “graveyard dirt” dark, crumbly, and a little spooky!
Whipped Topping (aka Cool Whip): This makes the dessert airy and fluffy. You can make your own homemade topping too.
Milano or Chessmen Cookies (for Tombstones): These buttery cookies are the edible decorations that bring the graveyard to life (or… to death?). Use black gel icing to write “RIP” or silly names for a fun, personal touch.
Candy Pumpkins, Halloween Sprinkles & Marshmallow Ghosts: No rules with these just have fun and make it look like a graveyard.
See recipe card BELOW for quantities.
How To Make Ghosts In A Graveyard

Step 1: Make the “dirt”: Place the chocolate cookies in a food processor (or crush in a bag with a rolling pin) until they resemble soil.
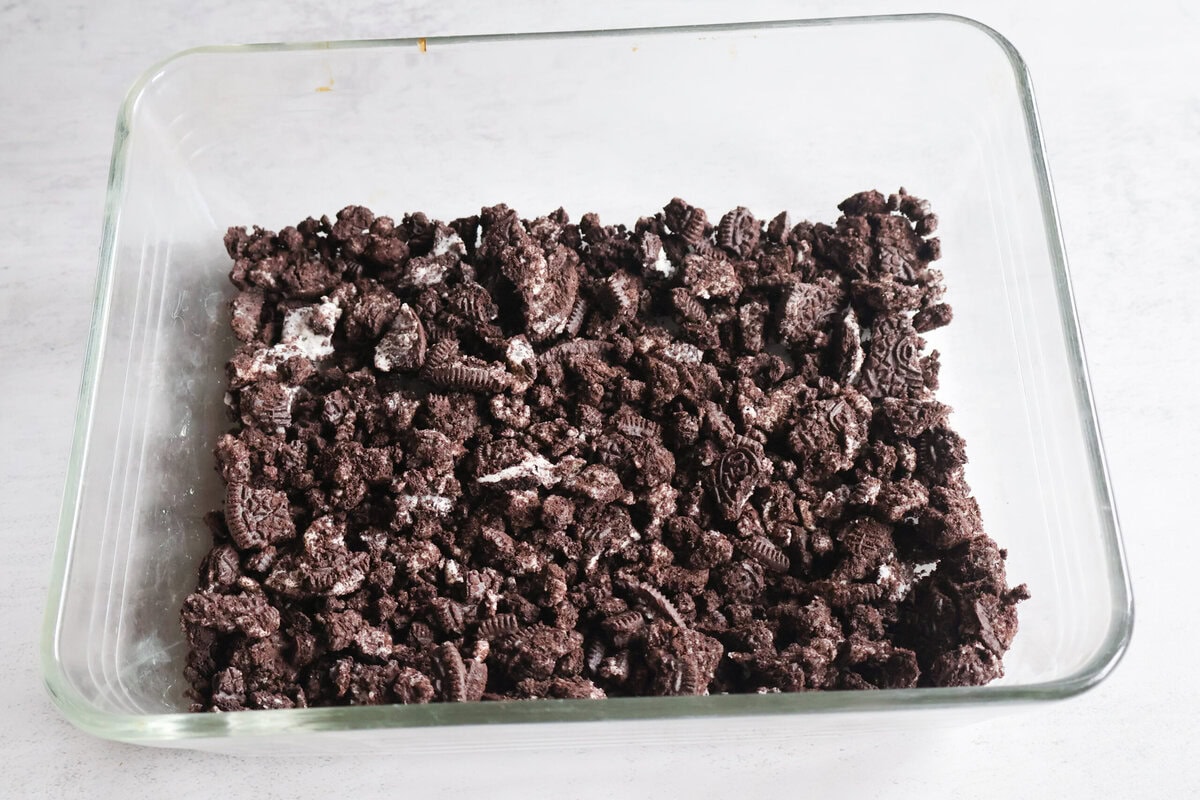
Step 2: Add HALF of the chocolate sandwich cookies to bottom of your dish. Set Aside.

Step 3: Next, Pour the ingredients for the pumpkin pudding layer in a bowl, and whisk thoroughly until the mixture is smooth.

Step 4: Put the pumpkin pudding mixture over top of the crumbled cookies and add the rest of the crumbled cookies to the top.

Step 5: Add in your fun toppings like Milano cookies, Peep ghosts gummy worms, and candy pumpkins! Enjoy!
Tips and Tricks:
1. Use Cold Milk for the Pudding:
Cold milk helps the pudding set faster and stay extra creamy. Warm or room-temp milk can make it soupy, and nobody wants a “mudslide” graveyard.
2. Crush the Cookies Just Right:
A mix of fine crumbs and a few small chunks gives the best “dirt” texture. Too fine and it looks dusty; too chunky and your ghosts might fall over!
3. Don’t Stress the Look!
Actually, a bit of messiness actually enhances the look; uneven dirt and crooked tombstones contribute significantly to the graveyard vibe.
4. Add a Touch of Shine:
A light sprinkle of edible glitter or gold dust adds a magical shimmer like moonlight over your graveyard. It’s subtle yet impressive.
Graveyard Substitutions/Variations:
Pumpkin Spice Pudding: Can’t find pumpkin spice pudding? Try your local Walmart! Otherwise, just use vanilla or butterscotch pudding mix and 1 teaspoon pumpkin pie spice.
*Bonus twist: For a creamier fall flavor, mix in a spoonful of canned pumpkin purée right into the pudding before folding in the whipped topping.
Whipped Topping
Substitute: Use freshly whipped cream with a splash of vanilla extract or maple syrup for a homemade touch.
*Bonus twist: For a richer texture, use cream cheese whipped topping (combine softened cream cheese and whipped topping for a cheesecake consistency.)
Milano or Chessmen Cookies (for Tombstones)
Substitute: Graham crackers, shortbread fingers, or rectangular sugar cookies also work great.
*Bonus twist: Use chocolate-dipped cookies or write spooky names like “Boo,” “EEK,” or “Frank” with colored icing pens for extra personality.

Useful Equipment for Ghosts in the Graveyard Recipe:
Whisk or Electric Hand Mixer
A good whisk will do the job, but an electric hand mixer makes whipping up the pudding a total breeze, especially if you’re making a double batch.
Rubber Spatula
Perfect for folding whipped topping into your pudding without deflating it. It also makes scraping every last bit of that delicious pumpkin mix out of the bowl super satisfying.
Food Processor or Rolling Pin
If you’ve got a food processor, it’s cookie-crushing time! If not, a rolling pin and zip-top bag work just as well for making that “graveyard dirt.”
9×13-inch Pan or Trifle Dish
A classic pan is great for serving family-style, but a clear trifle dish shows off all the delicious layers and colors.
Offset Spatula or Silicone Spreader
This makes it easy to smooth the pudding and cookie layers evenly. It’s one of those little tools that makes a big difference in presentation.
Icing Pens or Piping Bag
Perfect for writing “RIP” or spooky names on your tombstone cookies. You can also use them to draw little ghost faces or spider webs for extra flair.
Decorating Tweezers or Small Tongs
Great for placing delicate candies, sprinkles, and ghost toppers exactly where you want them and no sticky fingers or smudged icing!
Mini Mason Jars or Plastic Cups (Optional)
If you’re making individual servings, these are perfect for parties or grab-and-go Halloween treats.

Storage and Make Ahead Tips:
1. Make It a Day Ahead for Best Flavor
This dessert actually gets better after chilling! The pudding thickens, the flavors mingle, and the cookie “dirt” softens just slightly — giving you that perfect creamy-meets-crunchy texture. You can make it up to 24 hours in advance and keep it covered in the fridge.
2. Add Decorations RIGHT Before Serving
To keep tombstones and marshmallow ghosts looking crisp and upright, wait until right before serving to decorate. If added too early, moisture from the pudding can soften them or make colors bleed.
3. Keep It Covered and Chilled
Store your finished dessert tightly covered with plastic wrap or a fitted lid. It’ll stay fresh in the fridge for up to 3 days. Just make sure it’s kept cold — pudding-based desserts can get weepy if left out too long.
4. Refresh the “Dirt” Layer
If you’re serving leftovers, sprinkle a few fresh crushed cookies on top right before serving to bring back that crisp texture and dark “graveyard soil” look.

FAQ'S
Is there a gluten-free option?
Definitely! Just use gluten-free chocolate sandwich cookies for the “dirt” and gluten-free shortbread cookies for the tombstones. Everything else stays the same.
How long will leftovers last?
Stored in the fridge, this dessert stays delicious for up to 3 days. The cookie layer softens slightly, but that creamy, cozy flavor still shines.
Can I freeze it?
You can freeze it before decorating! Cover tightly and freeze up to 2 weeks. Thaw overnight in the fridge, then add toppings before serving. (Once decorated, freezing can cause soggy cookies and candies.)
Other Popular Seaonal Recipes:


Pizza Chili
Equipment
- Large Heavy-Bottomed Pot or Dutch Oven Perfect for browning the meats and simmering the chili evenly without scorching.
- Wooden Spoon or Silicone Spatula Great for breaking up the sausage and beef and scraping all that flavorful goodness from the bottom.
- cheese grater Freshly grated mozzarella and Parmesan melt smoother than pre-shredded.
Ingredients
- 1 lb Italian sausage (mild or hot)
- 1 lb ground beef
- 1 small onion, diced
- 4 cloves garlic, minced
- 1 green bell pepper, diced
- 1 28oz can crushed tomatoes
- 1 15oz can tomato sauce
- 1 15oz can fire-roasted diced tomatoes
- 1 cup beef broth
- 1 tablespoon tomato paste
- 2 teaspoon Italian seasoning
- 1 teaspoon dried oregano
- 1 teaspoon dried basil
- ½ teaspoon crushed red pepper flakes (optional)
- 1 teaspoon sugar (balances acidity)
- Salt & black pepper, to taste
- 1 cup mini pepperoni slices
- 1 cup mushrooms, sliced
- 1½ cups shredded mozzarella cheese
- ½ cup grated Parmesan
Instructions
- In a large pot or Dutch oven, brown the sausage and ground beef over medium heat. Drain excess grease.
- Add onion and bell pepper; cook until softened, about 5 minutes.
- Stir in garlic and cook 30 seconds until fragrant.
- Add crushed tomatoes, tomato sauce, diced tomatoes, beef broth, tomato paste, and all seasonings.
- Simmer uncovered for 30–40 minutes, stirring occasionally.
- Stir in pepperoni and mushrooms during the last 10 minutes.
- Turn off heat and fold in 1 cup mozzarella and Parmesan until melty and delicious.
- Serve hot with more cheese on top and all the pizza-style toppings your heart desires.
Notes
Toppings for Serving
- Extra mozzarella
- Fresh basil or parsley
- Garlic croutons or cheesy breadsticks
- Parmesan crisps
- Drizzle of garlic butter or hot honey (trust me! It's amazing!)